Spirulina Growing Guide

We are committed to supporting you to grow the culture you received from us so that you can regularly harvest fresh Spirulina to supplement your diet with one of the most nutritionally dense foods on the planet. Spirulina is an ancient organism that was here from the beginning of time. The species is over 3.6 billion years old and so has had a long time to figure out how to survive and flourish. Bottom line? It is hard to kill.
However, there are a few things you need to do to ensure that your culture thrives. You do need to care for it! But luckily it’s easy and won’t take up a lot of your time.
Please note: Upon receiving your culture, please immediately follow the instructions described in the “Immediate Culture Care” section (following this section).
To grow your culture up to a volume of 10 -15L, please carefully follow the steps in the Quick Guide. If you are new to growing Spirulina, please follow the instructions without deviation. You can improvise later when you get to know Spirulina a bit better. The rest of the manual gives you background and further detailed instructions on what equipment to use and how to set up the micro-farm and the build up to final volume.
You have all the information you need in this manual to successfully grow, maintain and harvest Spirulina.
While it seems like a lot of information to take in at first – the basics are very simple. You place the culture in the sun, keep it moving, monitor the temperature, build up the volume slowly with the Fast Grow Nutrient mix, harvest when it is deep green in colour and the pH is 10 or more and add replacement nutrients. It really is that simple – 6 moving parts.
What you need to immediatley do with the culture when you first receive it:
Spirulina uses the sun’s energy to turn carbon dioxide into its food (sugar). So right now, it needs sunlight and fresh air because it has just spent up to a week in the post, and thus without food or air.
After receiving your culture, immediately follow these steps and associated notes:
Step 1: Give the culture a gentle swirl.
NOTE: If you are not immediately ready for Step 2 then open the top of the culture bottle to allow it to breathe and then place it in shaded sunlight. Be sure to agitate your culture a few times a day by gently shaking the bottle.
Step 2: Transfer the culture to a transparent container. Any clean, non-reactive, transparent container will do.

The container used should be larger than the volume of the culture you received:
- For 50mls of culture, transfer to a container that’s around 200 – 600mls
- For 500mls or 1000mls of culture, transfer to a 2L – 4L container

Equipment
You will need:
- An aquarium air pump
- Tubing
- An in-line air valve
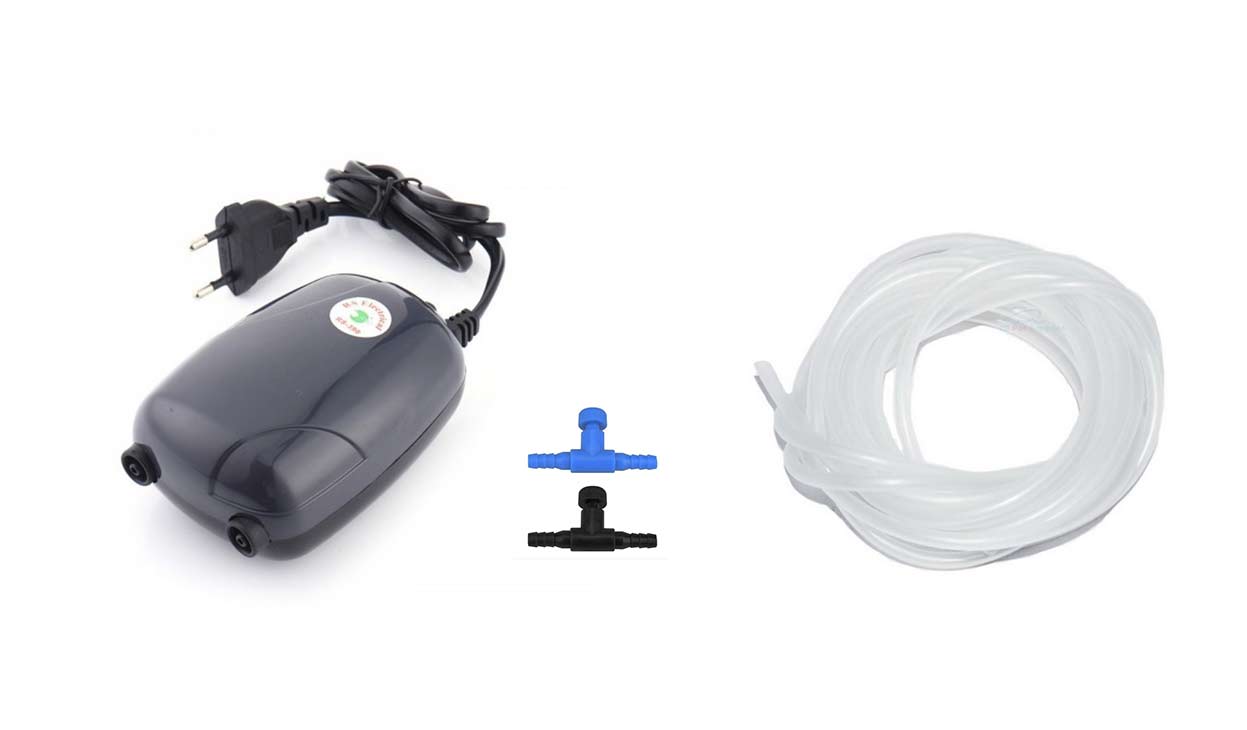
Step 3: Bubble air through the culture.
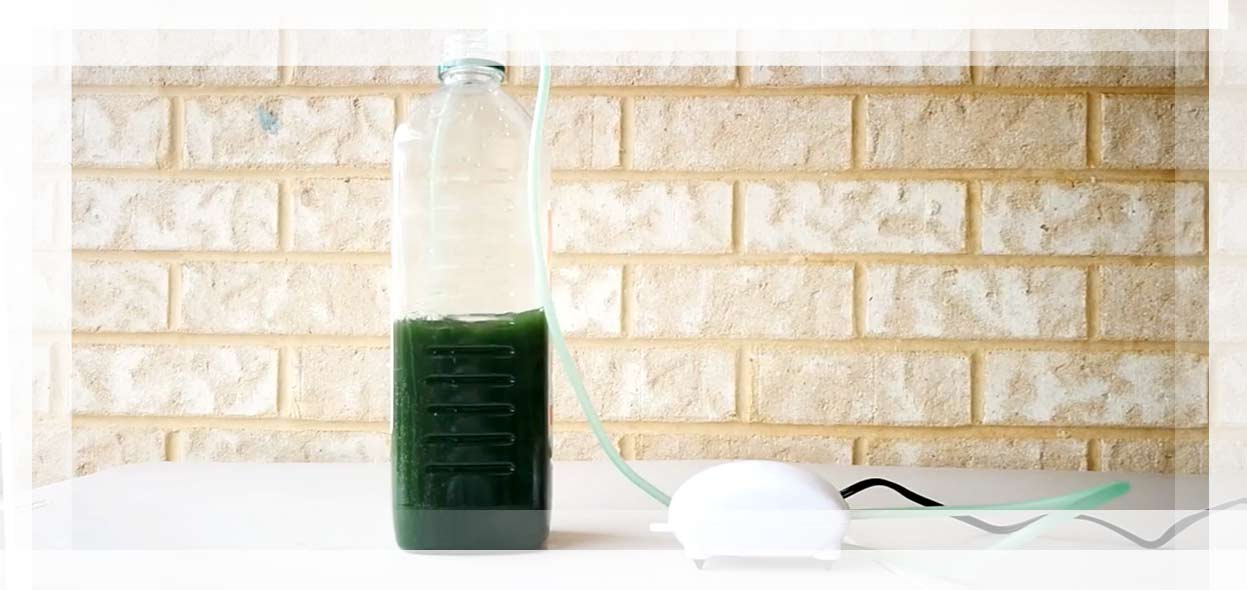
NOTE: Use a gentle stream of bubbles. Enough to keep the culture moving. Avoid aggressive bubbles – this tends to shear the Spirulina filaments. Regulate the flow of air using the in-line screw valve.
Step 4: Place the cuylture in shaded sunlight.

Sunlight
Do not, at this stage, place your culture in direct sunlight. This is important because the organism cannot handle intense direct sunlight when it is at a small volume and can’t self-shade. You could place the culture in a sunny location but cover it with a cloth that lets light through. As the culture becomes larger and denser, it can self-shade and will do better in direct sunlight.
Temperature
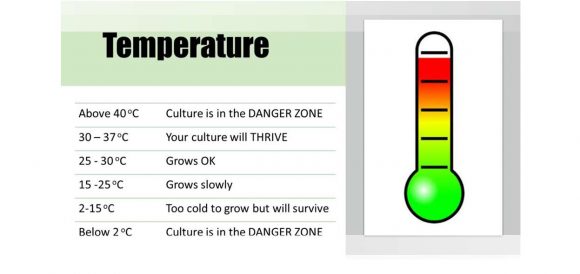
Spirulina can live at temperatures between 2 – 45oC. However, it will thrive and multiply the optimal being 27 – 37oC. So, if you live in a cold place, take steps to maintain the temperature of your culture to at least above 15oC and ideally between 27 – 37oC.
You might like to buy a digital thermometer with a probe to monitor the culture’s temperature. You may also consider purchasing a USB heat matt to keep the young culture warm. Both of these items are cheap on eBay.
Prepare for the next step
Your culture can survive comfortably under the conditions described above for a long time. However, to use and gain the benefits of Spirulina, you will need to increase the volume. Therefore, the next step will be to increase the volume of your culture. The quick guide section below details how you build up to 10L – 15L. Please follow these instructions carefully to ensure you end up with a healthy, thriving culture. While 10 – 15L represents a solid volume to work with and build on, you will need at least 80 – 100L to harvest meaningful amounts of spirulina.
This Quick Guide assumes you have taken the steps described in the immediate culture care section above. By now you should:
- have transferred the culture to a larger transparent container
- be bubbling air through the culture
- and have it placed in the sunlight
The next phase involves increasing the volume up to 10 – 15L. This is a gradual process whereby you add starter nutrient solution at a rate of 1/3 of the present volume of the culture, wait a while for the culture to grow into the new volume, add more solution, wait a while then add more solution and so on as described below.
How to set up the micro-farm Spirulina tank (bioreactor) and build it up to the final volume is described in detail in the rest of the manual.
Step 1: Make up the nutrient solution
Follow the instructions in the “Making up the Nutrient Solution” section.
Step 2: Add nutrient solution
- Before adding nutrient solution, note the shade of green.
- Add nutrient solution at a rate of roughly 1/3 of the current volume of the culture. This is important because you don’t want to dilute the culture and make it weak or it will be vulnerable to sun damage. Table 2 in the How to make up the nutrient media sheet that accompanies the Fast Grow nutrient kit details the suggested volume of mediat to add to the culture at vaious volumes. For example:
- If you are starting with 50ml then add 15 ml of nutrient solution
- If you are starting with 500ml then add between 150 ml
- If you are starting with 1L then add 300ml
- Make sure the culture and nutrient solution are at about the same temperature. Spirulina doesn’t like sudden temperature fluctuations.
- The Spirulina will multiply and grow into this new volume in 2 – 3 days if you are maintaining optimal temperature and it has at least 12 hours of light per day (more is better).
- Note the shade of green in this more dilute the culture.
Step 3: Monitor temperature
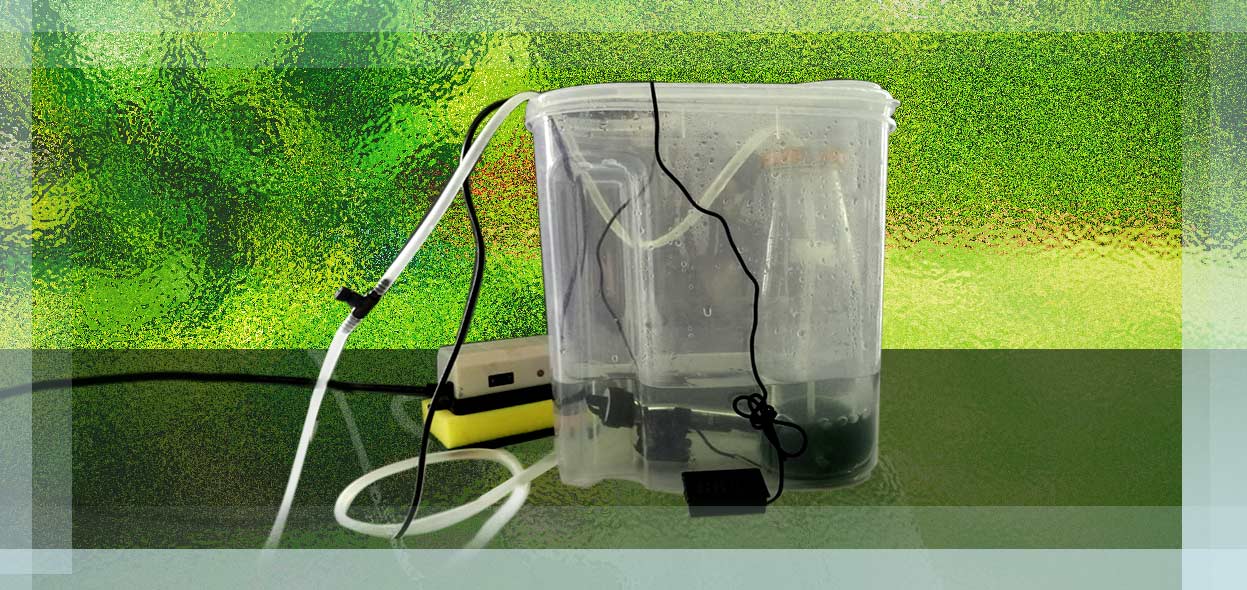
- If the temperature of the culture is lower than 15C, then put the container holding the culture in a 5L container (could be larger or smaller). Add water to the 5L container so it is as high as the level of the culture. Obtain a small 25watt – 50watt aquarium heater. Set the heater to 32oCand place it in the 5L container so it will sit under the water. Turn it on (see picture below). You could also use a USB heating mat.
- Place the probe of a digital thermometer in the water so you can monitor the temperature.
- Remember, the sweet spot is between 27 – 37oC.
Step 4: Monitor the colour of the culture
Keep an eye on the colour of the culture. As it grows into the new volume it will become denser and thus darker green. When the colour returns to the original shade of green that you would have noted at the beginning of step 2 then go to the next step. It should take 2 – 3 days under warm sunny conditions for the culture to grow into the new volume and turn dark green.
Step 5: Add more nutrient solution
- Remember, you add roughly 1/3 of the current volume.
- If you started off with 50ml you now have about 70ml from the last time you added the nutrient solution. So this time you would add roughly a 1/3 of 70ml which is about 25ml (you don’t need to be super exact).
- If you started with 500ml you would now add roughly 250ml.
- If you started with 1000ml you would add about 450ml.
Repeat steps 3 to 5
- Continue to monitor the temperature. Remember the sweet spot is between 27 – 37oC. Make sure that the young culture is not in the full sunlight all day or it may overheat and or get sunburned.
- Each time you add more culture remember it is 1/3 of the present volume. The amount you add will increase each time to account for what you added in the last cycle.
- Continue this cycle until your vessel is full.
Step 6: Transfer culture to a larger container
- Once the current container is full, move the culture and the air-tube to a larger container (remember to keep the tube at the bottom of the container.)
- If you have filled up a 600ml bottle then you could transfer the culture to a 1.5L. If you have filled up a 2L container then consider transferring to a 4 to 5L container – check the equipment section for ideas.
- Ensure that the bubbles from the air tube are keeping the culture moving.
Step 7: Make a Secchi disk
Make a Secchi disk to more accurately measure the density of your culture (check the equipment section).
Repeat steps 3 to 6
- Keep monitoring the temperature and colour of the culture, adding more nutrient solution and transferring to a larger container until you hit 10 – 15L.
- If you are now using a container that will allow you to insert a Secchi disk, then proceed as follows: slowly immerse the Secchi disk into the culture whilst in the sunlight. At the point you cannot see the disk anymore, read how many centimeters down you are from the stem of the disk. This equates to a density of the culture. Once your culture is at a density of 2-3 cm, you are good to increase the volume.
- Remember to check that the culture is moving. If you have moved to a larger container from a bottle, stick the air hose to the bottom of the container with a suction cap. Ideally, you will get the best agitation if the end of the hose is in the center of the container.

Step 7: Read the rest of this guide
You are strongly encouraged at this point to read the rest of this guide. If you are unsure about anything, then seek clarification from us. Once you read the following sections, you will know how to set up your Spirulina tank, care for it and harvest the Spirulina.
Step 8: Transfer culture to the final bioreactor
Once you hit 10 – 15L, you are ready to transfer to a larger Spirulina tank (bioreactor). See the rest of this manual for instructions.
This section shows you how to make up a starter nutrient growth media (solution) from one of the Fast Grow Nutrient Mix kits that you can purchase from us, or that has been provided with a Spirulina starter culture. These nutrient kits are used to increase the volume of the culture. They are not intended as a means of replacing nutrients that have been lost from the culture when Spirulina is harvested.
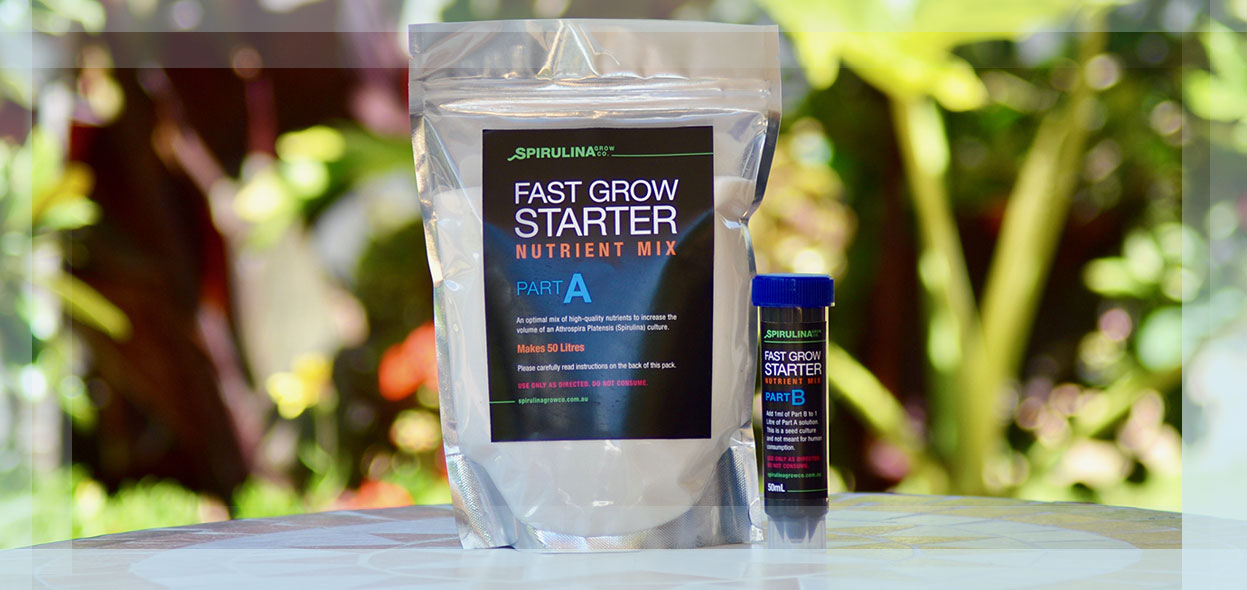
The Fast Grow Starter Nutrient Mix kit comes with 3 parts:
- Part A (1kg) contains mineral salts (solid)
- Part B (50ml) contains micro-nutrients chelated in liquid form
- Instruction sheet
One Fast Grow kit (pouch + tube of black liquid) will make up 50 L.
Method to make up the Nutrient Mix
Step 1:
Decide on the amount of nutrient solution you want to make up. We advise you to only make enough for 4 -5 volume increases. Remember the nutrient solution is a perfect media for other algae. So to reduce the chances of your nutrient solution being overrun with an unwanted organism keep stored volumes to a minimum.
Store the unused culture in a clean sealed vessel. Place in a dark place if you are using a transparent container.
Step 2:
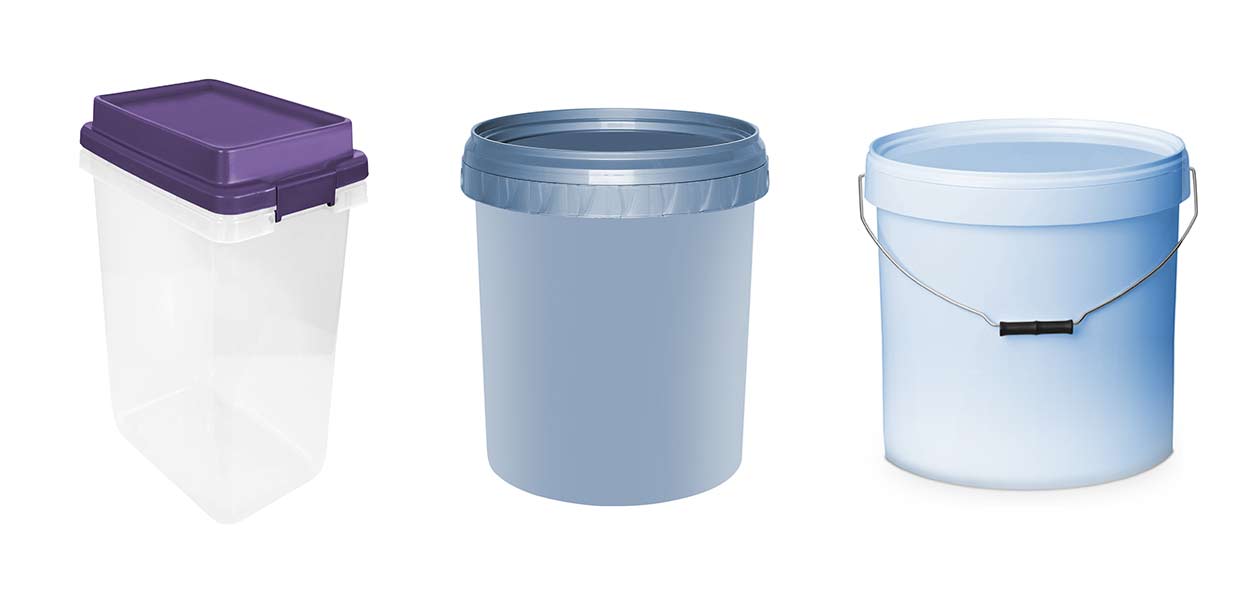
Using an appropriately sized container add the desired weight of part A salts for the volume you intend to make up. See the table of weights and volumes provided with the nutrient kit (Table 1). For example, if you wanted to make up 2L of solution (top row of the table), from the second row of the table you will find that you need to add 40g of salts (this corresponds with the number 2 from the first row).
Step 3:
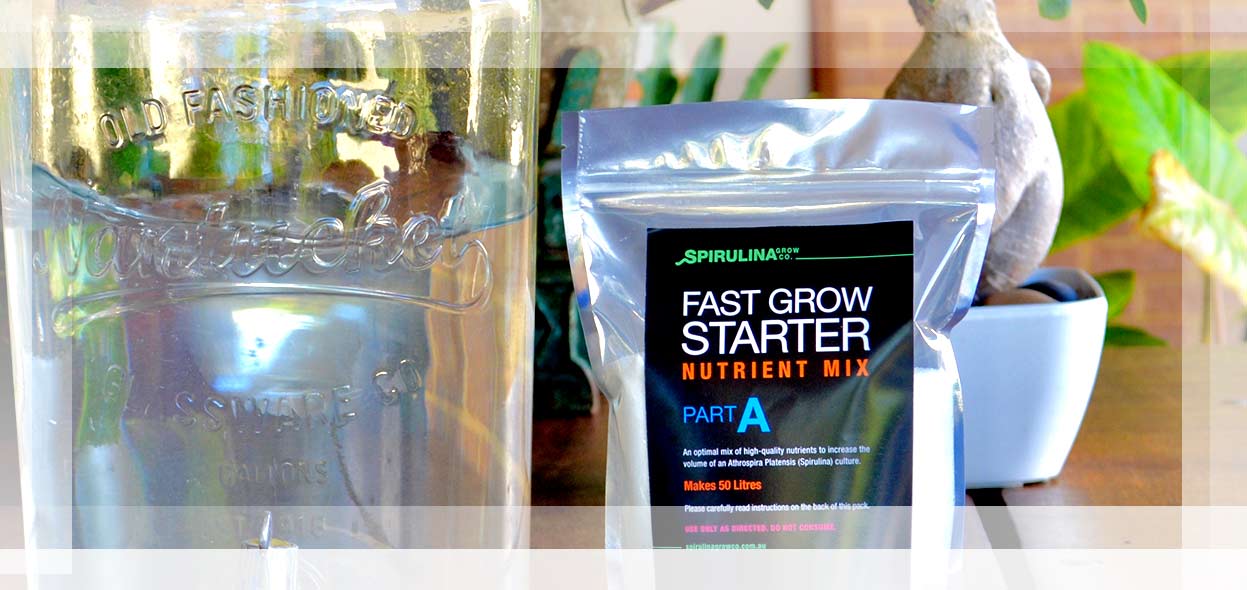
Add the desired volume of clean non-chlorinated water that corresponds with the weight of nutrient salts.

Use Non-chlorinated Water
- Fresh rainwater
- Chemically dechlorinated tap water
- Filtered tap water
- Bottled water
- Fresh river water that has been sanitized

If you only have tap water available, then there are various chemical dechlorination products and brands in the marketplace – buy online or from an aquarium shop.

Step 4:
Mix until the solid Fast Grow Starter Nutrient Mix Part A is completely dissolved in the water.
Step 5:
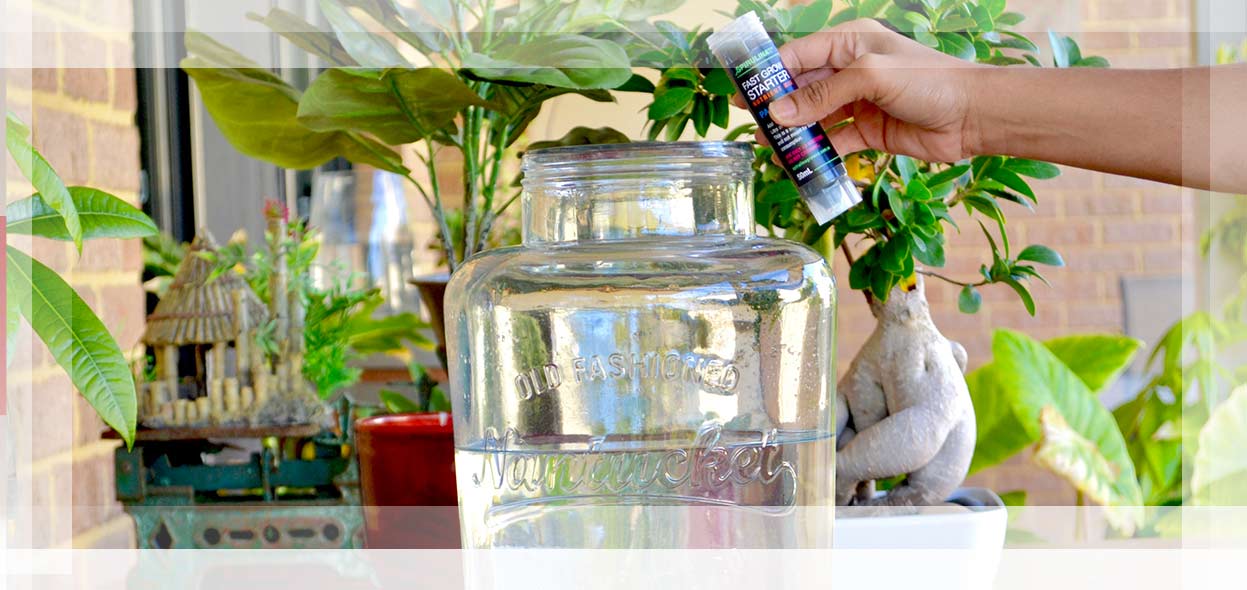
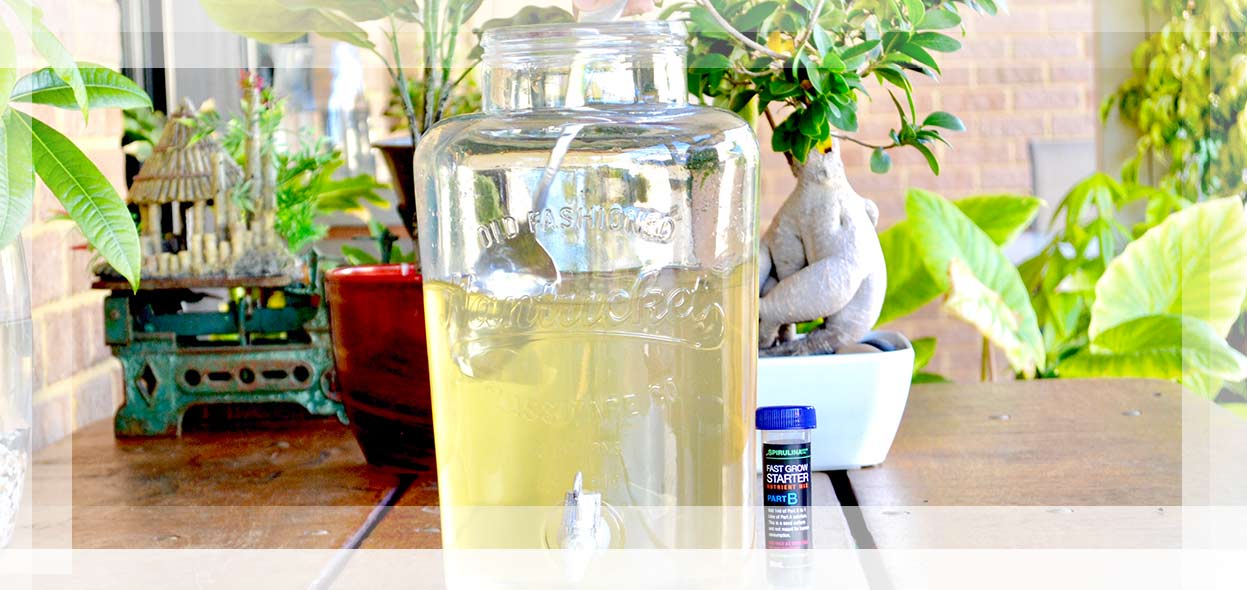
Now add the appropriate quantity of part B after giving the tube a good shake. The quantity to add can be found in the” Water to nutrient mix ratios” table 1. So, for 2L of nutrient solution, you would add 2ml of part B.
Step 6:
Mix Part B thoroughly to complete the Nutrient Mix.
Step 7:
Store the Nutrient Mix in a cool, dark place when not in use.
Growing Spirulina is simple and straightforward. Once you create the right conditions and provide the required nutrients it will happily double its biomass every 2 to 3 days. As pointed out above, spirulina has survived for billions of years without our help. It is a robust organism and is very efficient at using resources. However, there are some general principles to understand and get right. They are as follows:

Light
Remember, Spirulina, like grass and trees, is a photosynthetic organism. It uses the sun’s energy to turn carbon dioxide into sugar. In this sense, light is like Spirulina’s food. This means the quality of light reaching your culture is of vital importance and will determine how well it grows.
When your Spirulina culture is thriving and strong, the general rule is that the more light, the better. Thus, the more surface area of the culture exposed to the light, the faster it will grow.
Sunlight is best because it carries a lot more energy than even the strongest light globe and is composed of the correct light frequencies for Spirulina.
However, with sunlight, there are two caveats to the more-light-the-better rule:
- Sunlight carries a lot of energy and will heat your culture tank (bioreactor) up quite quickly, particularly if the ambient temperature is hot. That is why it is important to monitor the temperature of your culture. You may need to shade the bioreactor to reduce the heat load during the hottest times of the day.
- When the culture is young and not very dense, too much sunshine can hurt them. They get sunburnt. Therefore, when you are growing your culture up after first receiving it you will need to shade it. You can do this by placing some see through fabric over the bioreactor.
As your culture grows and becomes denser it will shade itself. When assessing if you should shade your culture the general rule is: if you can see all the way through the culture, or most of the way in, then you should shade it.
Artificial light
As you consider artificial light, remember that it’s pretty hard to compete with natural light, which can be 100 times brighter than artificial light. Further, the sunlight has a full spectrum of wavelengths that Spirulina can use to photosynthesize. However, if you are growing Spirulina inside, and you are not getting good natural light or if you want to boost the growth rate of your culture, then artificial lights are a good strategy.
A general rule of thumb for Spirulina is to choose a light that has warmer colours that contain light in the orange to red range (625 – 650 nm). These wavelengths allow Spirulina to absorb a higher fraction of the light and increase the growth rate.
For an average-sized aquarium, you could use a 600ml 2 tube fitting with 6,500K 24″ T8 17W Bulbs. Put the lights on a timer and set it on a 16 – 8 hours day-night cycle. Spirulina needs a day and night cycle to thrive. You could also use LED light banks sold for hydroponics setups. An example of which, is shown below:

Temperature
Every organism has temperature maxima and minima, beyond which, they will not survive. They will also have an optimal temperature range, within which, they will thrive. For Spirulina, the maxima and minima are from 2oC and 45oC. Thus, if you let the temperature of your culture go beyond these limits it may die. This is the most common cause of culture death.
The culture will start to grow at temperatures over 15oC. However, you will get optimal growth at temperatures between 27 – 37ºC.
In Summary:
Outdoor temperatures fluctuate on a day-night cycle as the sun comes and goes. Many organisms, like Spirulina, are adapted to this and prefer a smooth diurnal temperature fluctuation rather than a constant temperature. Remember, Spirulina is an ancient organism and is kind of set in its ways.
The bottom line is that it is good for the culture to get a bit cooler during the night and warmer during the day. What Spirulina does not like, is sudden temperature fluctuations. This can occur when adding growth media, which has a large difference in temperature, to the culture; beware of doing this.
TAKE HOME MESSAGE – the temperature is important so monitor it. If the temperature is too cold use an aquarium heater and if it gets too warm then shade the bioreactor.
Water
The culture medium, which is composed of water with nutrients dissolved in it, is another important parameter. The quality of the water is important because Spirulina will absorb whatever is in its environment. This means that it will accumulate heavy metals and other toxins if they are present in the water, which is not good because the whole point of growing Spirulina is to eat it and be healthy.
Further, certain elements can kill Spirulina at critical concentrations, chlorine, and copper for example. Since tap water is usually chlorinated, you cannot use tap water without removing the chlorine first. Remember the whole point of chlorinating tap water is to kill microorganisms. Likewise, ensure that you do not use copper implements or containers when growing Spirulina – copper kills microorganisms too.

Use Non-chlorinated Water
- Fresh rainwater
- Chemically dechlorinated tap water
- Filtered tap water
- Bottled water
- Fresh river water that has been sanitized
The aim is to use good-quality water. There are various options:
- Fresh rainwater. If it has been sitting in a tank you need to filter it to remove any microorganisms or small insect larvae, such as mosquitoes.
- Chemically de-chlorinate tap water using an aquarium water conditioning solution (eg Api tap water conditioner).
- Filter tap water using a system that removes chlorine and heavy metals – for example, reverse osmosis.
- Bottled water: This is good at the start but can get a bit expensive if you have a large bioreactor.
- Fresh, river or spring water can also be used as long as it has been sanitized using either UV light or a carbon filter (the Brita type). This is necessary to remove other micro-organisms such as algae or protozoa which can compete with or eat the spirulina. This is more of a risk at the start of the culture when the culture is still weak and the pH is still relatively low.
pH
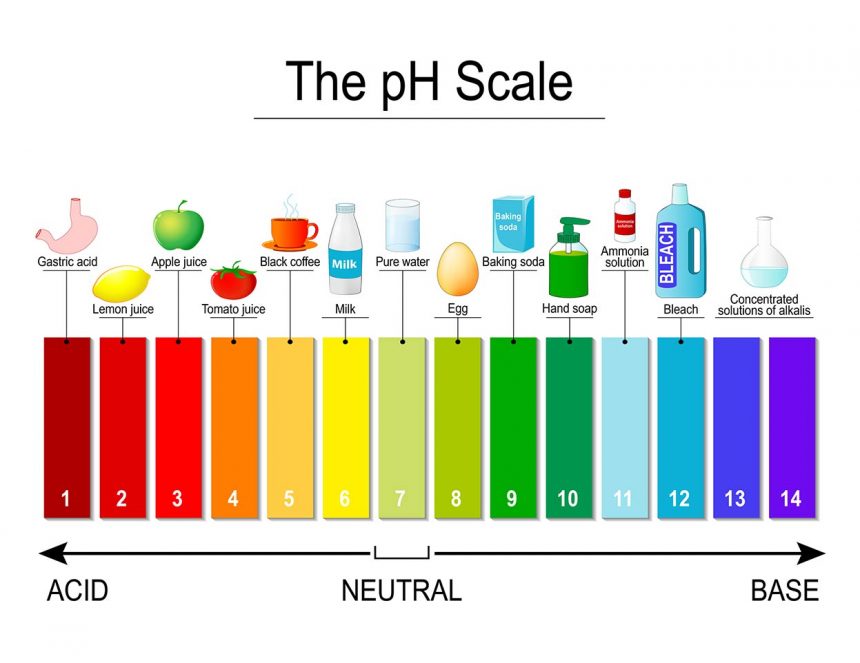
The pH is a measure of the number of hydrogen ions in a solution. Another way of saying this is, pH indicates the acidity or alkalinity of a solution.
The pH scale goes from 0 to 14 and is measured on a base 10 logarithmic scale which means that as the pH increases by 1, the actual alkalizing activity increases by an order of magnitude. For example, a pH of 2 represents a 100-fold increase from pH of 1. A pH of 3 represents a 1000-fold increase. To put this in an everyday context. Battery acid has a pH of 0; a lemon: 2.2, coffee: 5, blood: 7 (neutral); seawater: 8; baking soda: 8.5; Bleach: 13.5 and drain cleaner pH 14.
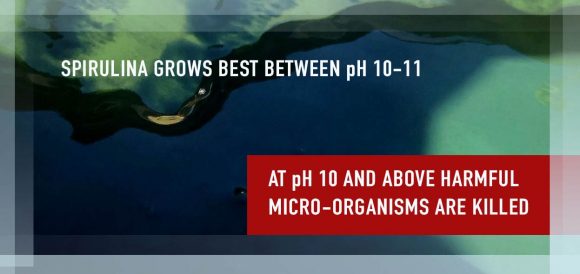 pH is a very important parameter in biological systems. What is unique about Spirulina is that it grows and thrives under very alkaline conditions of 9 and above. This is important because at pHs much above 9.5, most organisms that could damage or compete with Spirulina, or be harmful if you eat them, cannot grow. That is why you only harvest once the pH reaches 10 or more. Over time, Spirulina increases the pH of its surroundings and, in doing so, kills competitors.
Nutrients
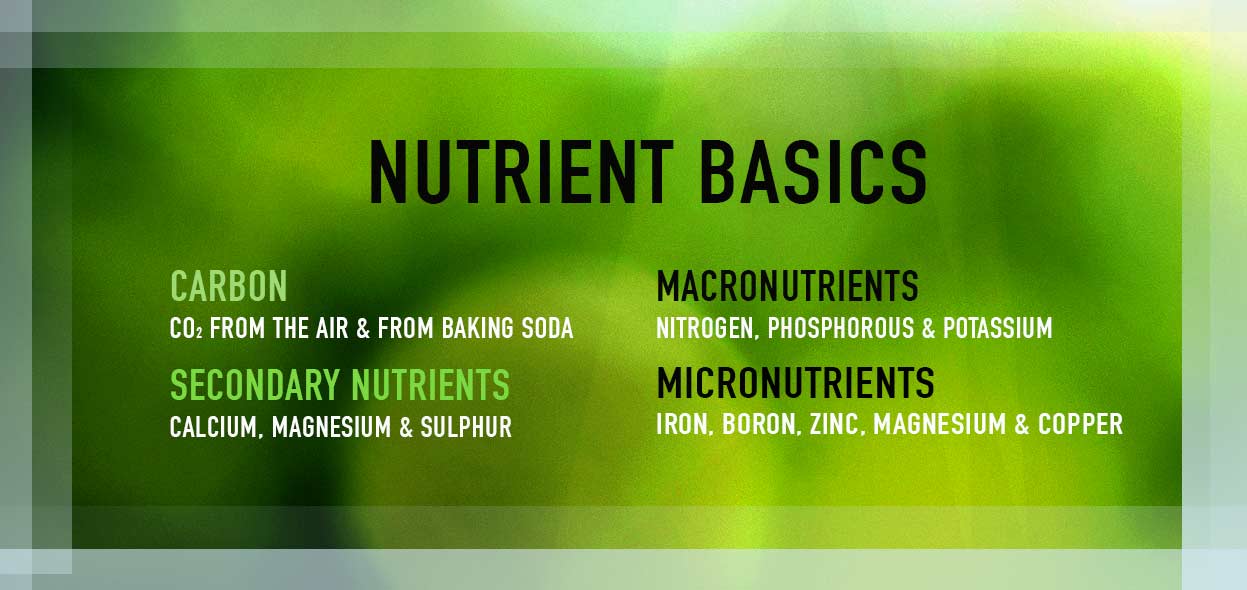
Spirulina needs the same set of nutrients that a vegetable plant needs to grow.
More nutrient details:
- An alkalized water – high pH
- A source of carbon (atmospheric CO2 or chemical such as baking soda from the Fast Grow mix)
- A source of fixed nitrogen – that is, nitrogen bonded with other elements, such as oxygen to make nitrate (NO3-1) or urea, which is nitrogen bonded with oxygen, carbon, and hydrogen (NH2CONH2). In these formats, the nitrogen is soluble in water and thus available for uptake by the reproducing Spirulina
- A source of key nutrients: iron, phosphorus, potassium, sulphur calcium, chlorine, and magnesium
- A source of trace elements – these are essential nutrients needed only in extremely small quantities such as boron, cobalt, manganese, zinc, and copper
You will need 2 media formulations, one to increase the volume of your culture and one to replace nutrients after harvesting.
There are a variety of different formulae for culture media that can be found in literature and online such as Zarrouk medium, Jourdan medium, the CFTRI mix, the BG-11 medium, and so on.
Agitation
Remember, when the culture is dense, light can only penetrate a couple of centimeters into it. It is important that each Spirulina filament get some sunlight but it is also important that they are not overexposed. So, the trick is to give the filaments enough light to facilitate photosynthesis but not too much so that they are damaged (sunburnt). That’s why is it crucial to keep the culture moving during sunlight hours. This will force Spirulina filaments to the surface, or near its transparent walls, for a short while before being displaced by others.
 Mixing, as suggested here, is achieved by bubbling air through the bioreactor. The bubbles also facilitated gas exchange with the air. To do this all you need is an aquarium air pump and some tubing.
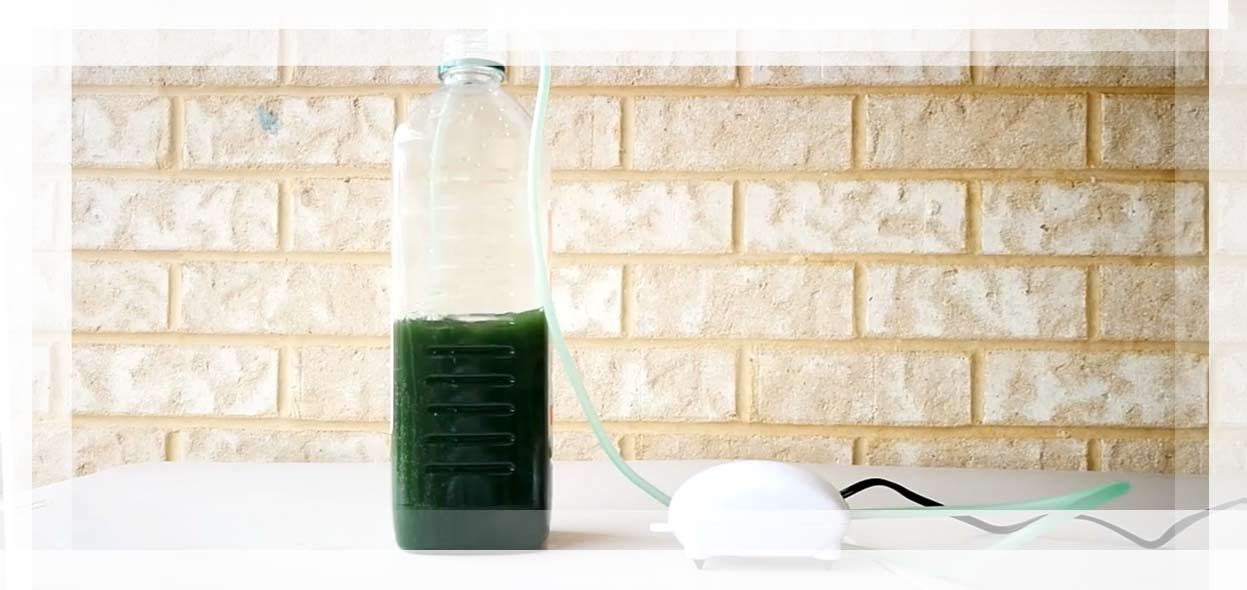
One note of caution here: Make sure that the bubbles are not too aggressive otherwise they will break up the Spirulina strands causing losses as cells are ruptured. If this is the case, you will find the surface of the bioreactor covered in foam caused by the contents of the ruptured cells.
You can regulate the intensity of the bubbles by installing a screw value in the airline.
Basic Equipment
To begin with, you will need some simple, easy-to-obtain equipment. You can get it all on eBay or from your local supermarket, Red Dot, hardware store, or aquarium shop. Here is a list of equipment you will need.
| Required Items | Notes | Examples |
|---|---|---|
| 5L Transparent container | Size/shape is not critical – 5L is a ball-park figure |  |
| 10L Transparent container | Size/shape is not critical – 10L is a ball-park figure |  |
| 30-100L Transparent container | A glass aquarium is perfect - an affordable option is to buy second hand from Gumtree. You can also use plastic storage containers - the larger the container ,the more you can harvest |  |
| Digital Aquarium Thermometer with probe | Affordable option is to buy on Ebay for approx. $1.50 – $4.00 | 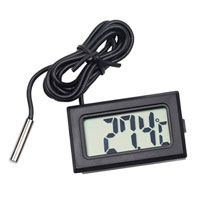 |
| Aquarium Heater with adjustable temp control | The size of the heater you need is dependent on the volume of your culture and ambient temperature in the coldest months | 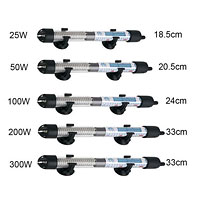 |
| Aquarium pump with dual outlet each pumping at least 3.5lt/min | Various options available - recommended to buy one that doesn’t make a loud noise. If in doubt, go with a higher air output. |  |
| 4m Flexible airline tubing with and inside diameter of 4ml, outside diameter 6ml | The best material is the flexible silicone tubing | 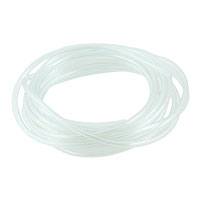 |
| In-line air value to regulate airflow so the bubbles are not too aggressive | Buy from an Aquarium shop or eBay | 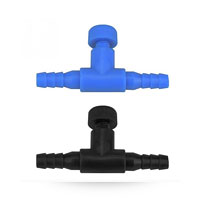 |
| Suction cups to suit diameter of tubing | Buy from an Aquarium shop or eBay | 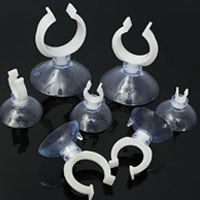 |
| pH meter (or litmus paper - see below) | Various options available on eBay that are affordable. All you need is the simple pen type. Of course, you do get what you pay for. | 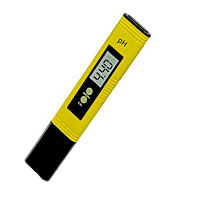 |
| Litmus paper | It's better to get a narrow range product that captures the transition from 9 – 10 with more accuracy | 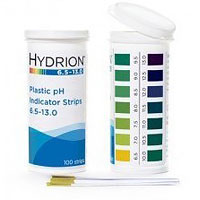 |
| Approx 2m of 15 – 20mm flexible plastic tube to use as siphon to harvest Spirulina | Use either a manual fish tank vacuum siphon pump (cheap on eBay) OR use a container and scoop the culture out to harvest | 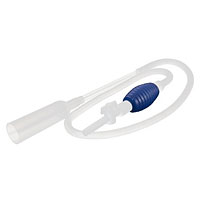 |
| Large 15 – 20L plastic bucket | A bucket is a bucket unless you are concerned about BPA in which case you could get food grade buckets |  |
| 25 – 30 micron mesh/fabric about 1m x 1m | Used to harvest Spirulina - should be robust nylon or acrylic, the best material to use is screen printing mesh. | 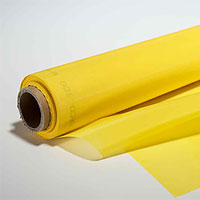 |
How to make a Secchi Disk
Being able to measure the density of your culture is important because, with density, you can determine its growth rate ans determine when to add nutrient growth media and the best time to harvest.
Luckily you don’t need anything complicated here. You can make up an accurate instrument for under $2: a Secchi disk.
What you need:
- A chopstick or something similar
- A 55mm diameter white disk – you can cut this from a white plastic container, a yogurt container lid, for example
1. With a black marking pen, make sections on the disk as shown in the picture.
2. Make a small hole in the centre of the disk and drive the chopstick through until it is secure.
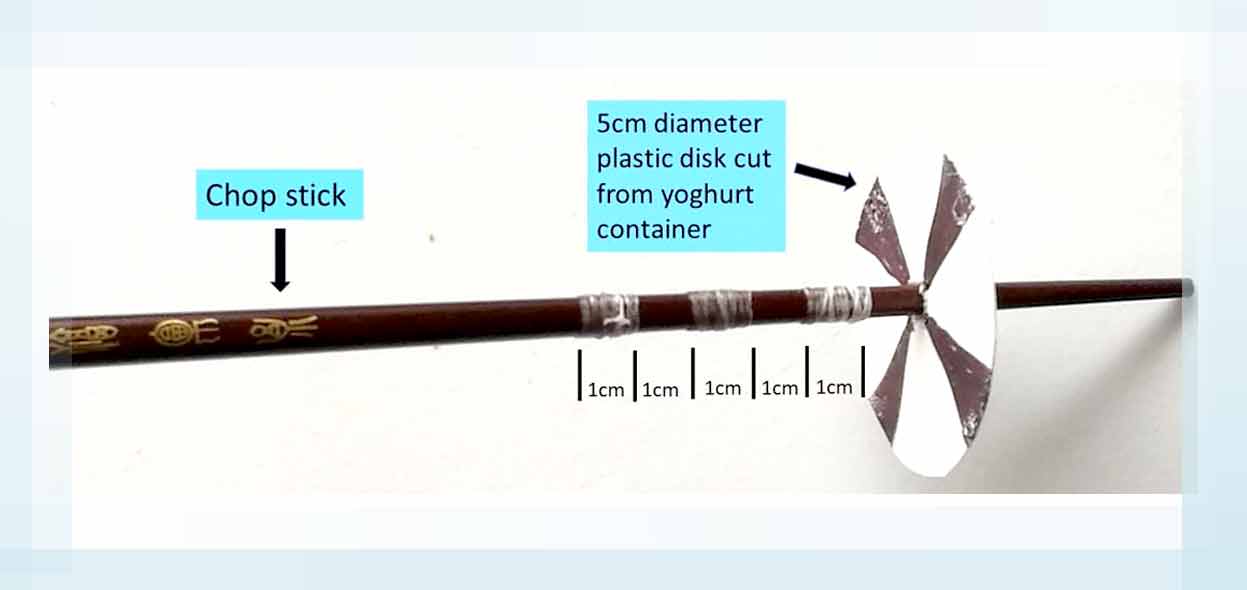
3. Make 1cm graduations from the top of the disk up the chopstick to 5cm. In the example above, dental floss was wound around the chopstick to make the gradations.
When placed in the culture, the depth at which the disk disappears correlates well with the density of the culture. For example, at a disappearance depth of 2cm, the density is at about 0.5 g/lt dry weight and at 4cm it drops off to 0.3g/lt.
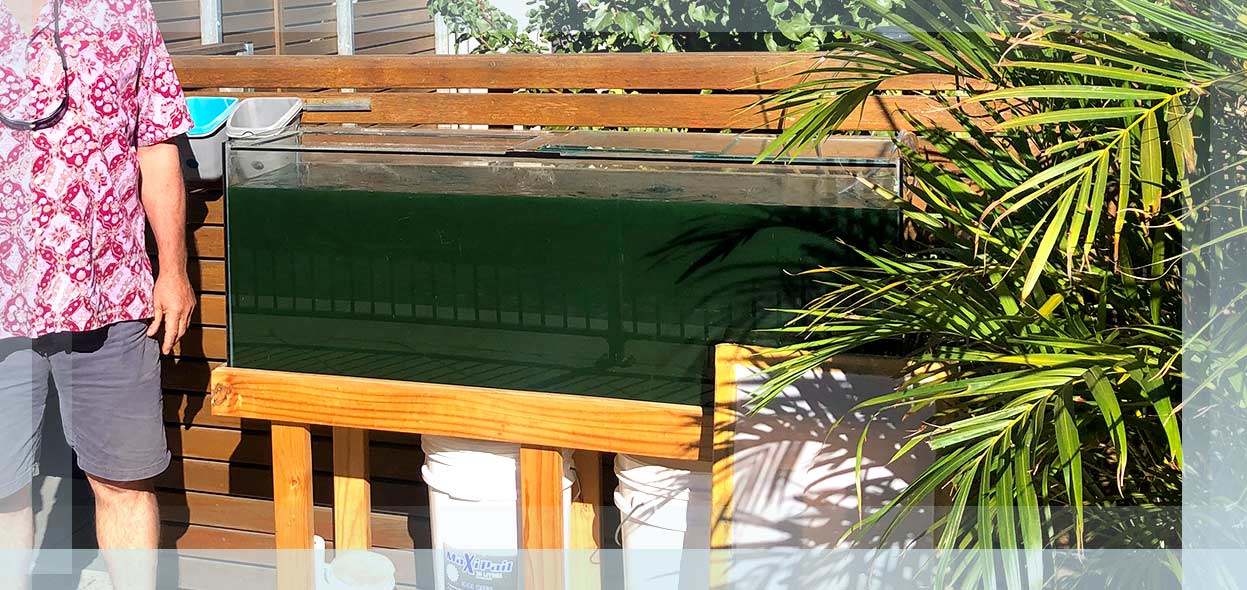
This section explains how to set up the bioreactor (what you farm the Spirulina in – aquarium, plastic tub, etc) and grow the culture until it is harvestable.
The idea here is to grow your culture slowly whilst maintaining a deep green colour as you go. If your conditions are favourable, as detailed above, then you can increase the volume of your culture by adding the nutrient media at a rate of about one-third of the volume of the culture every 2-3 days. You should have a Secchi disk density reading of 3 or less before increasing the volume.
Theoretically, you can grow 1000s of litres of culture from just 10mls of original cutlure. the trick is to build up slowly and pay attention to maintain optimal growing conditions.
But first a word about placement.
Placement
Before filling up your bioreactor you will need to find a permanent place for it to sit where it will receive adequate light.
Once your culture is dense and healthy (Secchi reading of under 4) the general principle is, the more sunlight it receives the more you can harvest. So, if you are going to place your bioreactor in a window then it will need to receive full light throughout the day to grow at an optimal pace.
It would be a good idea to monitor how many hours of full sun a prospective location receives a day before setting up the bioreactor there.
If an inside location is not going to give you enough hours of good sunlight then you may like to consider an outside location or supplementary lighting.
If you chose an outside location then you will need to monitor the temperature. In the summertime, you may need to shade the bioreactor to lessen the heat load during the hottest part of the day. Remember, the culture will die if it goes too much above 42oC.
Build-up instructions
Step 1: Place the bioreactor in the final location
Step 2: Fix the heater, if you need one, onto the side of bioreactor so it will be under the surface
Step 3: Fix the air tube on the bottom and in the centre of the bioreactor with a suction cup. Depending on the length of the bioreactor you may need 2 – 3 air tubes. Just check that the culture is being agitated as per the video above. You should be able to see a swirling motion within the culture in all parts of the bioreactor. A non-swirling zone will be a dead zone.
Step 4: Transfer the 10 – 15L of culture to the bioreactor. Depending on the size of the bioreactor you may need to add more culture to get an adequate movement with the bubbles. The deeper the cutlure the better agitation effect you will get with the bubbles.
Step 5: Put the thermometer probe into the bioreactor
Step 6: Turn on the heater if necessary. Remember the temperatures sweet-spot is between 27 – 37oC
Step 7: Ensure the air pump is switched on
Step 9: Add more nutrient solution at approximately 1/3 of the current culture volume if the secchi reading is 3 or less.
Step 10: Ensure that the bubbling is not too aggressive – make adjustments with the in-line flow valve
Step 11: Observe the culture in the sunlight to assess if the culture is being adequately mixed. You will be able to see if all parts of the culture are in motion by observing the movement of the filaments.
Step 12: Cover the top of the bioreactor with a lid
Step 13: Secure another media nutrient mix so you can increase to the maximum capacity of your bioreactor as your culture grows.
Step 14: Secure or make up a post-harvest replacement media mix for when you start harvesting. You can order both from Spirulina Grow Co if you like – Order Now
Step 15: When the culture reaches a density of 3cm (Secchi disk) add more nutrient media at a rate of 1/3 of the volume of the culture.
Step 16: Monitor temperature and take steps to maintain in between 27 – 37oC
Step 17: Repeat steps 15-16 until the bioreactor is full
Step 18: Monitor the pH
Step 19: When the pH is over 10, it’s ready to harvest
When to Harvest
Your culture is ready to harvest when it’s dark green or the density on Secchi disk reads 3 cm or less and the pH is over 10. Remember, it’s important to wait for the pH to get up to 10 to reduce the risk of contamination with potentially harmful organisms.
If your conditions are ideal and growth is good you can expect to harvest every 3-4 days. Remember, under ideal conditions a Spirulina culture can double its weight every 3 –4 days. Be aware that you can leave your culture unharvested for longer periods but you will suffer a significant drop in production due to the increased density, which causes a reduction in light penetration into the culture. You will also find that as the culture gets super dense it will tend to clump together and float on the surface. If this is left too long then it will go brown and icky.
How much to Harvest
The general principle here is that you don’t want to harvest so much that the culture becomes too sparse or it will be open to sun damage. As you harvest and return the filtrate (the solution left after filtering out the Spirulina) back to the culture, if you can see more than 4cm under the surface, then it’s time to stop. That is, if a Secchi disk reading is above 4, then stop and allow the culture to build up some more.
As you gain experience, you will be able to judge the shade of green at which to stop harvesting.
How to Harvest
Harvesting is easy. All you need to do is filter the culture through a fine mesh. Of course, there are a few tricks and ways to do it more efficiently.
The following video describes how to harvest using a piece of filter mesh and a bucket:
- As noted in the video, it is best to use silk screen fabric. It’s robust, industrial-strength fabric, and the mesh size is precise.
- Do not use a mesh size larger than 50 microns. The best is between 37 – 44 microns.
- You can buy mesh from a silkscreen shop or from our shop. The advantage of buying from us is that you don’t have to buy a whole meter of the material at a much greater expense.
- Remember to wash all your equipment before and after use. Stay clean. Remember, you will be eating the harvest.
A more efficient method…
The most efficient way to harvest Spirulina is by using a mesh frame that fits your bioreactor. A mesh frame is made by stretching and fixing the filter fabric (mesh) onto a frame so it is taut. If you are a bit handy, you can easily make one using wood, screws, staples, glue and varnish. Or get a handyman to make one for you. It’s well worth the effort or expense. You can also buy ready-made silkscreens from a silkscreen supplier as per the picture below:

The video below describes the process to harvest using a mesh frame:
Notes:
- You should only harvest Spirulina which is dark green. If you see brown, white, or yellow bits floating around, scoop them out of your tank and do not eat them.
- Remember to immediately wash your mesh screen after use. If you allow the Spirulina paste to dry it will be difficult to remove from the mesh pores later.
- Store harvested Spirulina paste in a clean glass container in the fridge. It will last up to 5 days. Remember, the nose knows. If it smells off then don’t eat it.
- You can also freeze excess material. Ice cube makers are perfect. Spirulina soaks up smells very rapidly so wrap your ice-cube trays with cling wrap.
When you harvest Spirulina, you remove nutrients from the system because they become locked up in the Spirulina biomass. This means to grow more Spirulina, you need to add more nutrients.
The nutrient mix you use for post-harvest feeding is different than the nutrient formula used to build up the volume of your culture.
There are various formulas you can find online to make up your post-harvest mix. Most ingredients are easy to find in the marketplace but the problem is that often buying in relatively small amounts is super expensive. You can buy the post-harvest mix from our shop if you don’t want the up from the expense of buying expensive components or messing around with formulation.
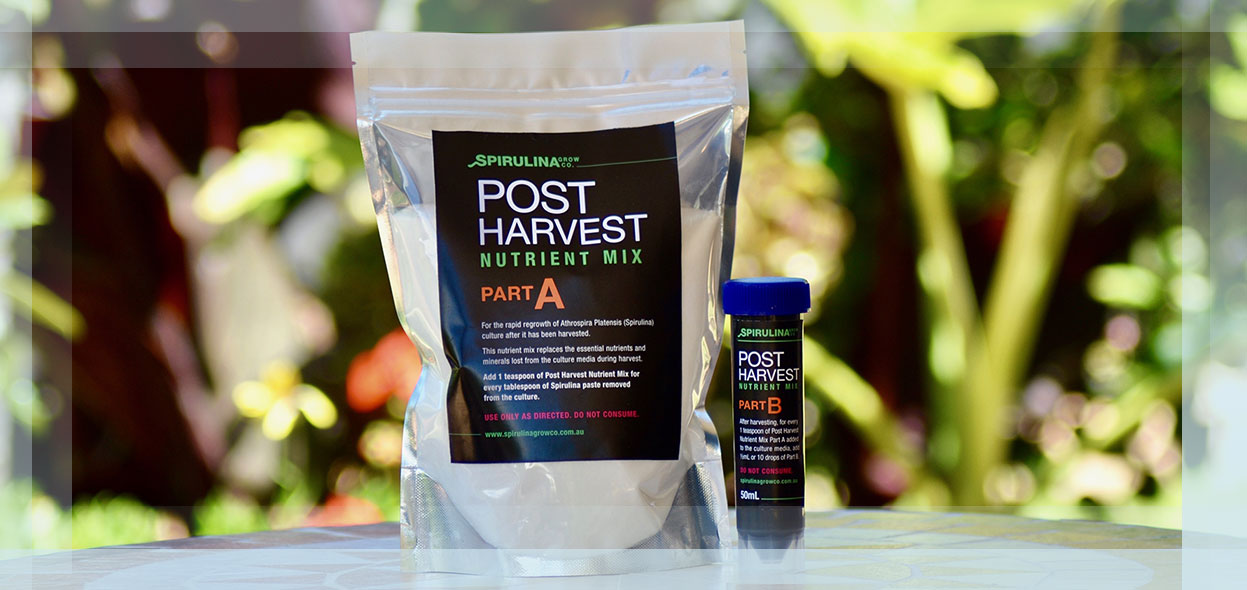
For the post-harvest nutrient mix that we sell, you add 1 teaspoon of nutrients to the culture for every tablespoon of thick Spirulina paste that you harvest.
Don’t hesitate, please feel free to ask us at Spirulina Grow Co
Premium Spirulina DIY Farming Kit
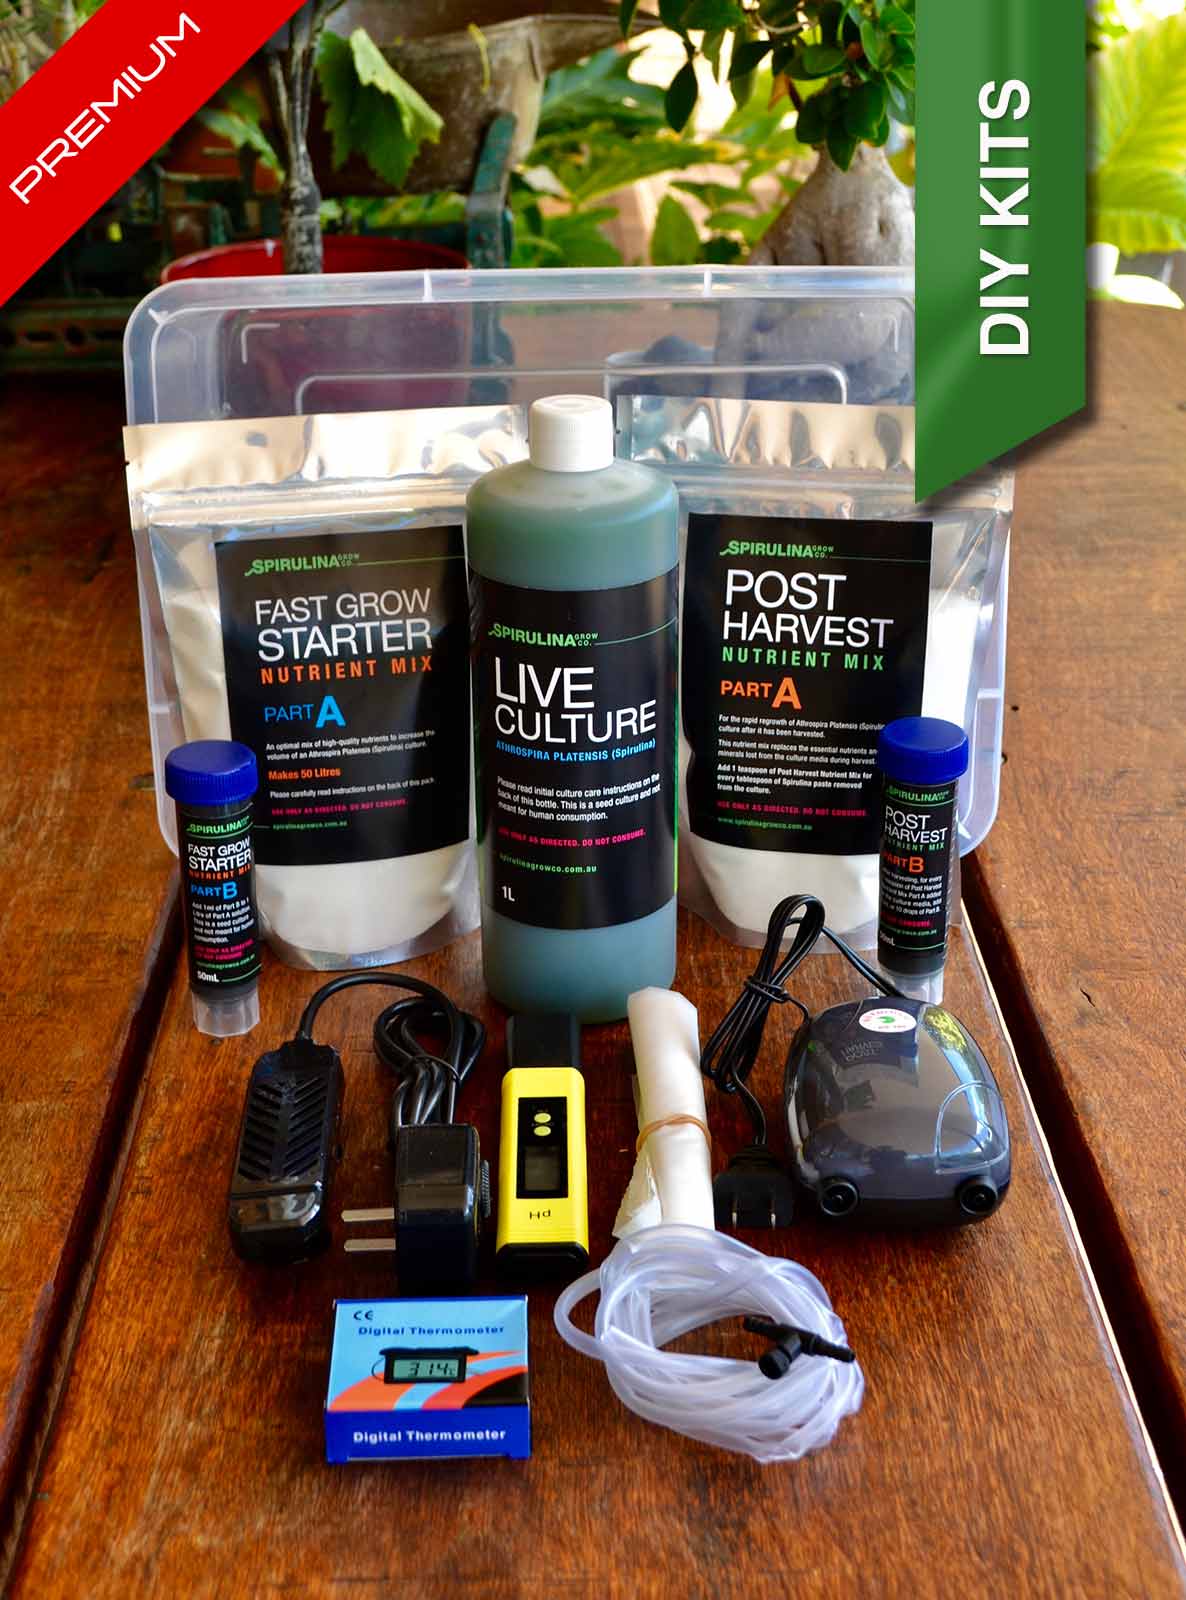
Premium Spirulina Farming Kit – Everything you need to start!
This Premium Spirulina kit that contains all the essential information, equipment, nutrients and culture needed to start, monitor, maintain and harvest your own Spirulina at home
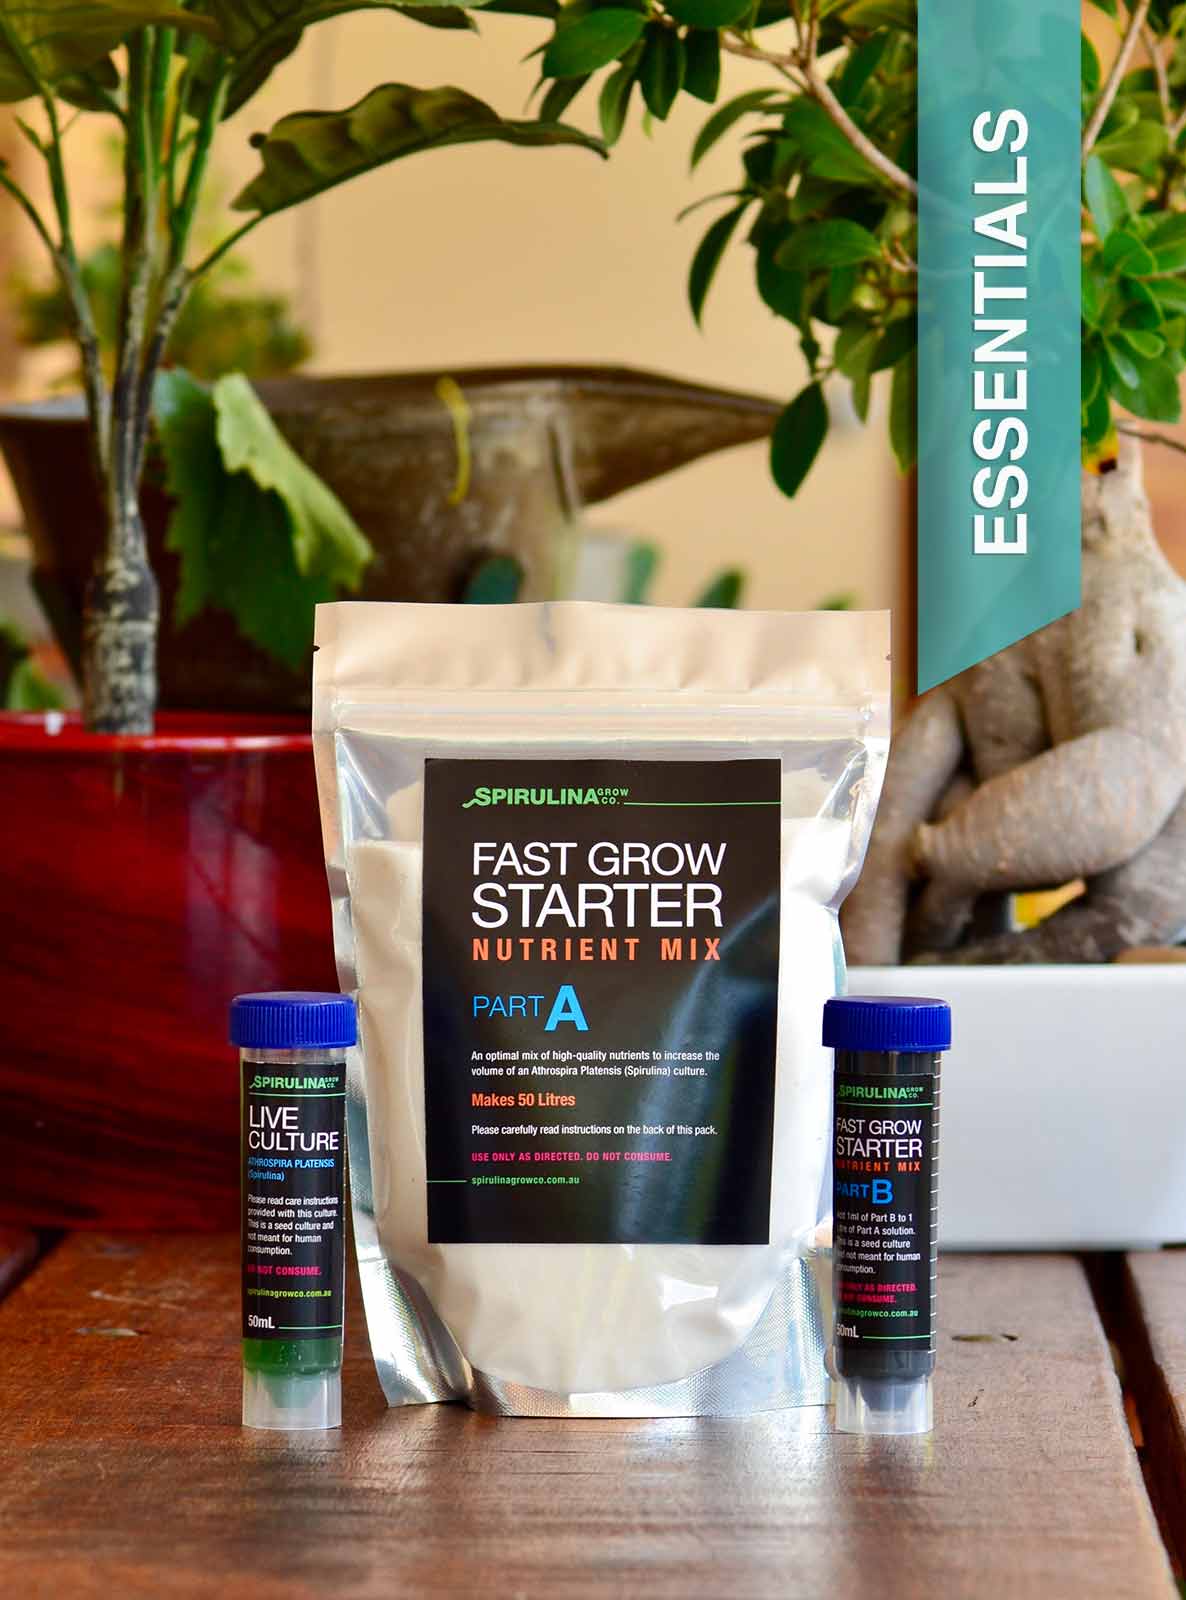
50ml Spirulina Live and Fast Grow Starter Pack
50 ml live Spirulina culture and Fast Grow starter nutrient pack
The 50 ml live culture and starter nutrient pack together with the instruction manual are the essential components you need to get your spirulina micro-farm established …
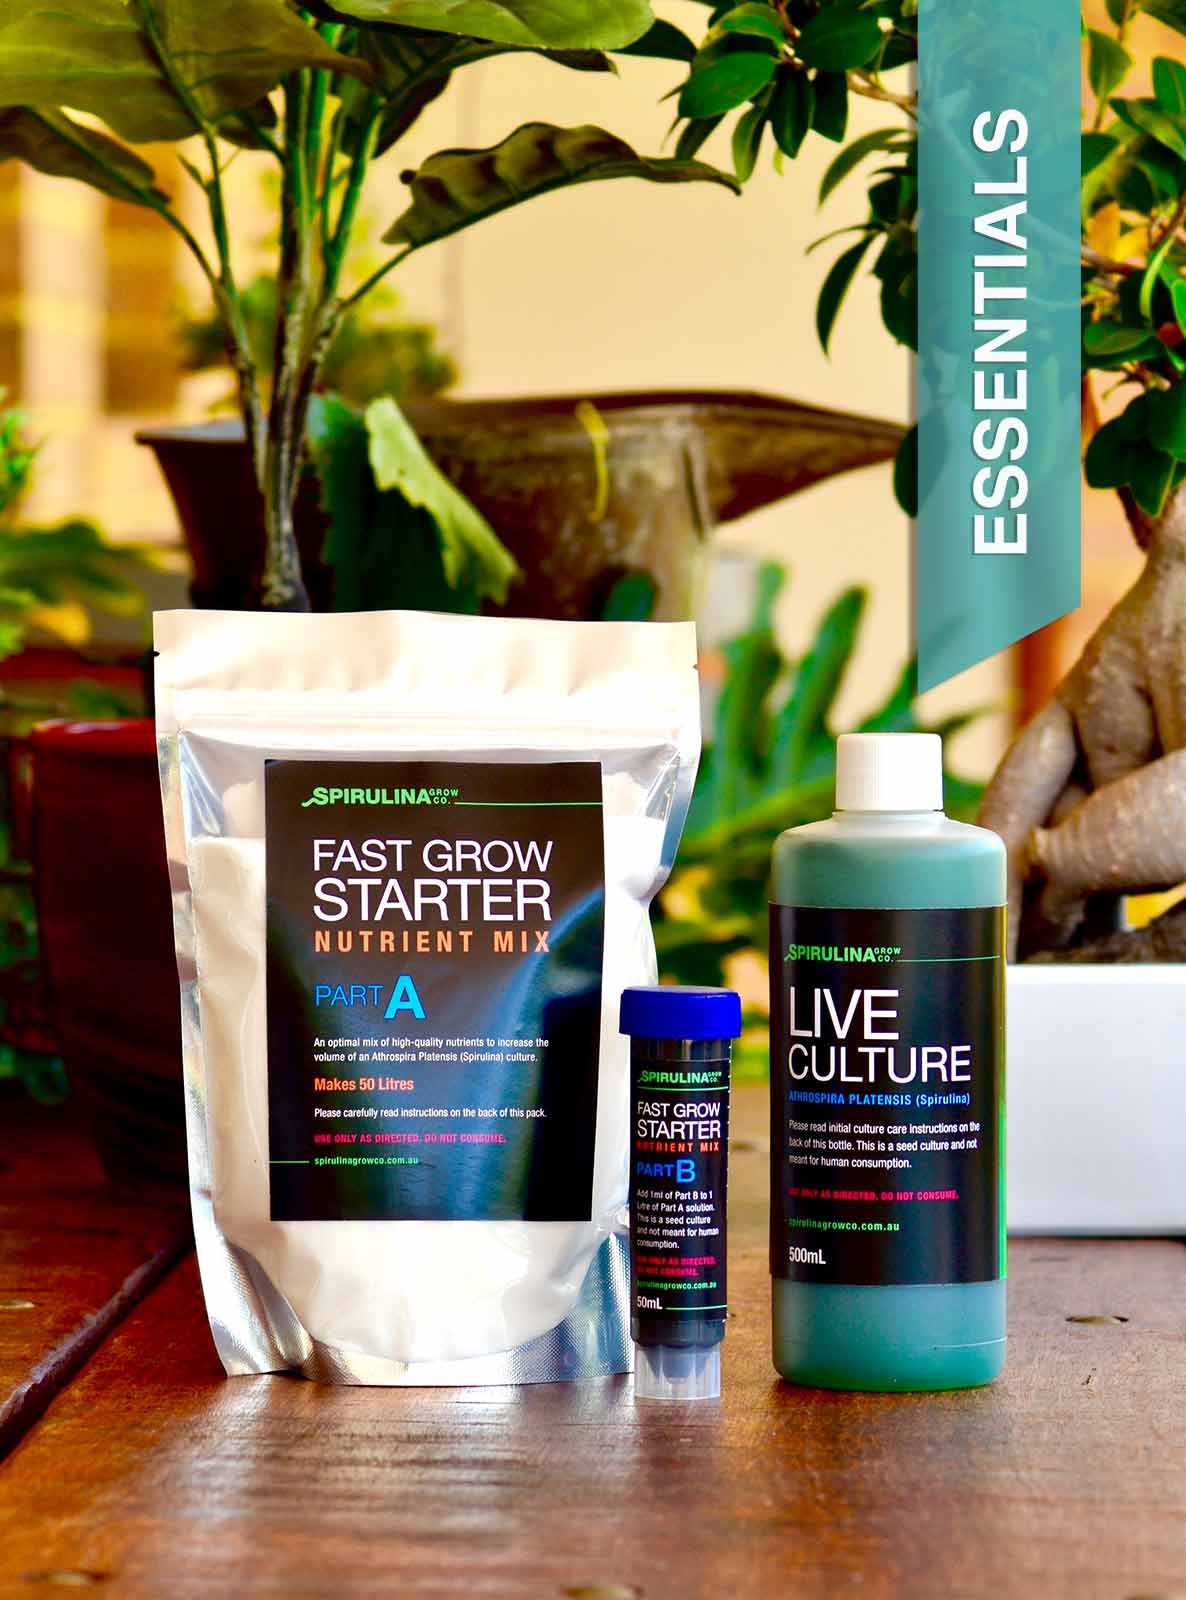
Spirulina Live Culture 500ml fast grow nutrient pack Australia
500 ml live Spirulina culture and Fast Grow starter nutrient pack
The 500 ml live culture and starter nutrient pack along with the comprehensive instruction manual contain the essential components needed to get your spirulina micro-farm established.
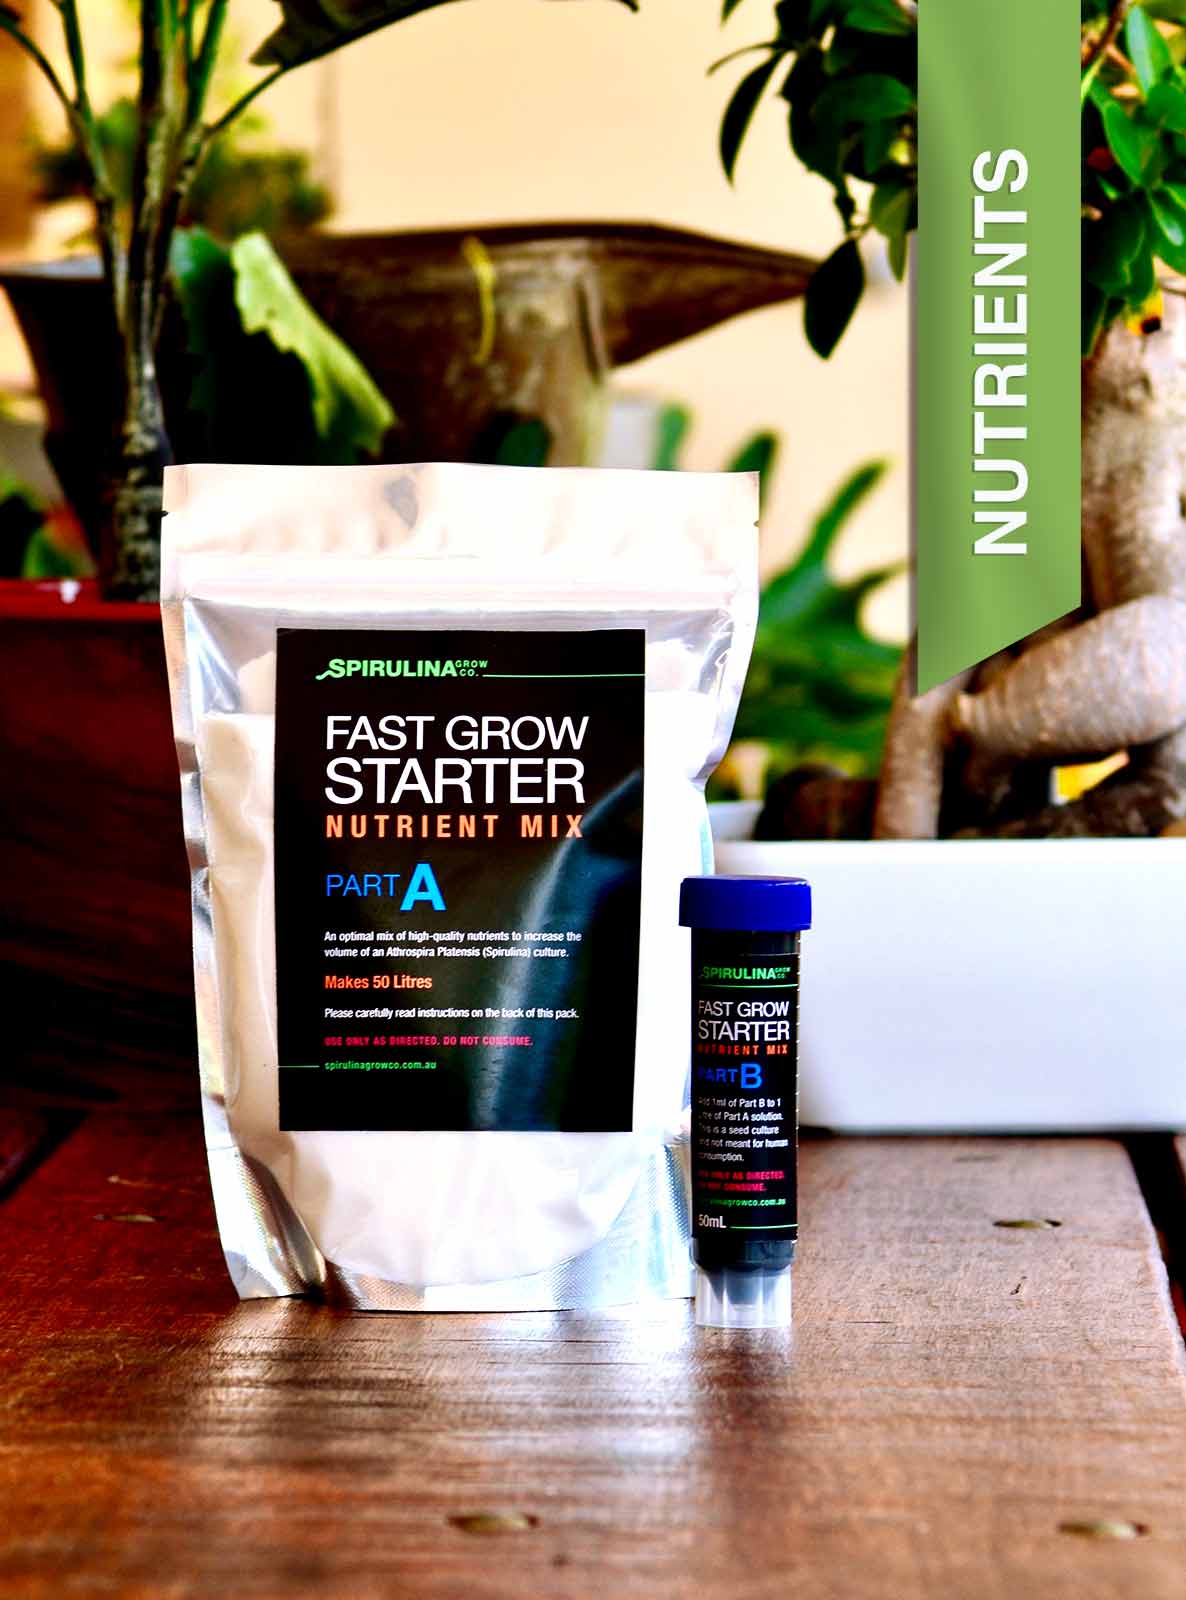
Spirulina Fast Grow Nutrient Starter Pack Australia
Fast Grow Starter Nutrient Pack For Cultivating your Spirulina
The starter nutrient pack is specially formulated for the rapid and healthy growth of your Spirulina culture. These nutrients are free from contaminants and heavy metals.

